One Code, Two Platforms, 200% Efficiency (2/3)
3D Model Assets Management Across Platforms
Amendment May 19th:
Here is the updated amendment of the model import on both platforms if you’re using RealityKitContent:
Typically it supports using the assets through RealityKit Content on both platforms just like below (even better isn’t it?)
But for some reason, my main project files just kept failing using this (maybe I need to re-import the RealityKitContent framework again in the framework settings). But a fresh new project works fine with this method on both platforms.

import SwiftUI
import RealityKit
import RealityKitContent

struct ContentView: View {

    var body: some View {
        RealityView { content in
            if let scene = try? await Entity(named: "cardStill", in: realityKitContentBundle) {
                scene.scale  = [15.0,15.0,15.0]
                content.add(scene)
            }
        }

    }
}

#Preview() {
    ContentView()
}
So please just use this method as a backup if the similar issue happens to you as well. But still try to use the RealityKitContent as much as possible to manage your 3D assets across platforms.
Thanks a lot!
Archived or Use as a Backup
This is the second article in my series on building a cross-platform app for iOS and visionOS. In this one, we’re zooming in on a key part of many immersive apps: 3D assets.
If you haven’t already, check out the previous article where I covered how to choose the right project template when starting a cross-platform build.
This post is about model storage optimization across platforms—how to use the same 3D model package on both iOS and visionOS without duplicating it.
RealityKitContent is great for asset management on visionOS, but here’s the catch—it’s not really supported in iOS. So we need a workaround. (Because come on, who wants to load the same model twice just to make it work on different platforms? Add one more platform and your storage might just let out a little “whoosh” as it implodes from the sweet Model Crush™.)
2 Options for Model Import :
- Option A - The Simple Route (No Shader Material)
If you’re not using any custom shader graph materials, just:
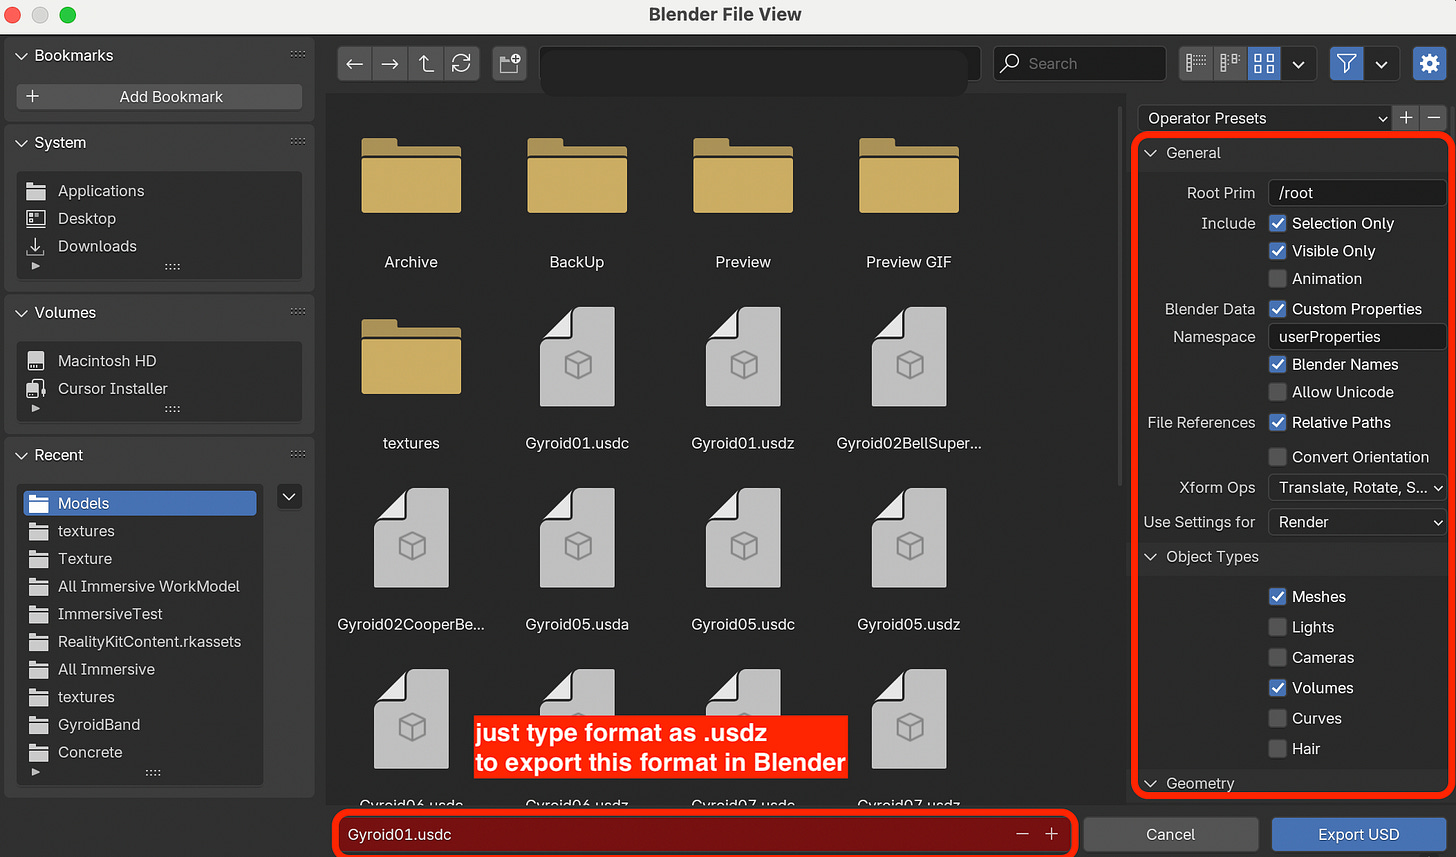
Export your model directly as .usdz from your modeling tool (e.g., Blender, Cinema 4D, etc.).
Import and put it in your project folder, call the model in code and add required components like InputComponent or CollisionComponent (if you need interactions to happen on model) directly in Swift.
//object.components.set(InputTargetComponent(allowedInputTypes: [.indirect,.direct]))
//object.collision = CollisionComponent(shapes: [.generateBox(width: 0.2, height: 0.2, depth: 0.2)])
Done. One model, shared on both platforms.
- Option B - The Shader Graph Route (1 more step)
If you do want to use custom materials (e.g., time-based changing material, shaders not supported natively in Swift, like those Shader Nodes from Blender), here’s the full pipeline:
Shader Graph Route — Step-by-Step
The basic process we go through here is like below:
usdc (model) → usda (shader material, input & collision from RCP) → usdz (out from RCP & into projects)
Step 1: Export the Base Model
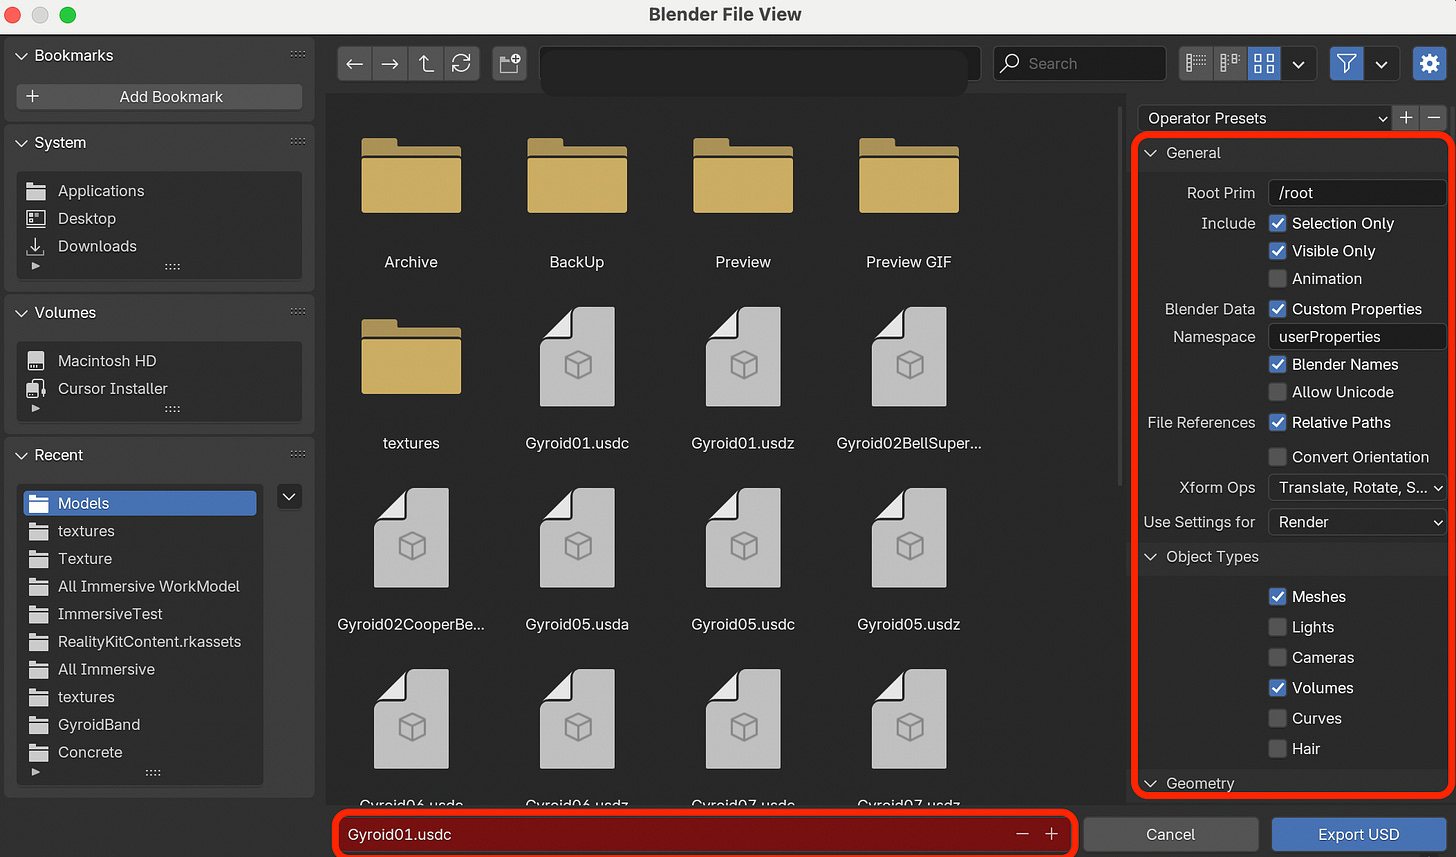
Export your 3D model as a .usdc file from your modeling tool.
Step 2: Import into Reality Composer Pro (RCP)
This is where you add shader magic.
In RCP:
Apply your custom Shader Graph material (e.g., one that changes over time).
(kudos to AtarayoSD, the great shader graph master, everyone should check out his repos on shader materials, a real treasure!)
Add other components like InputComponent and CollisionComponent.
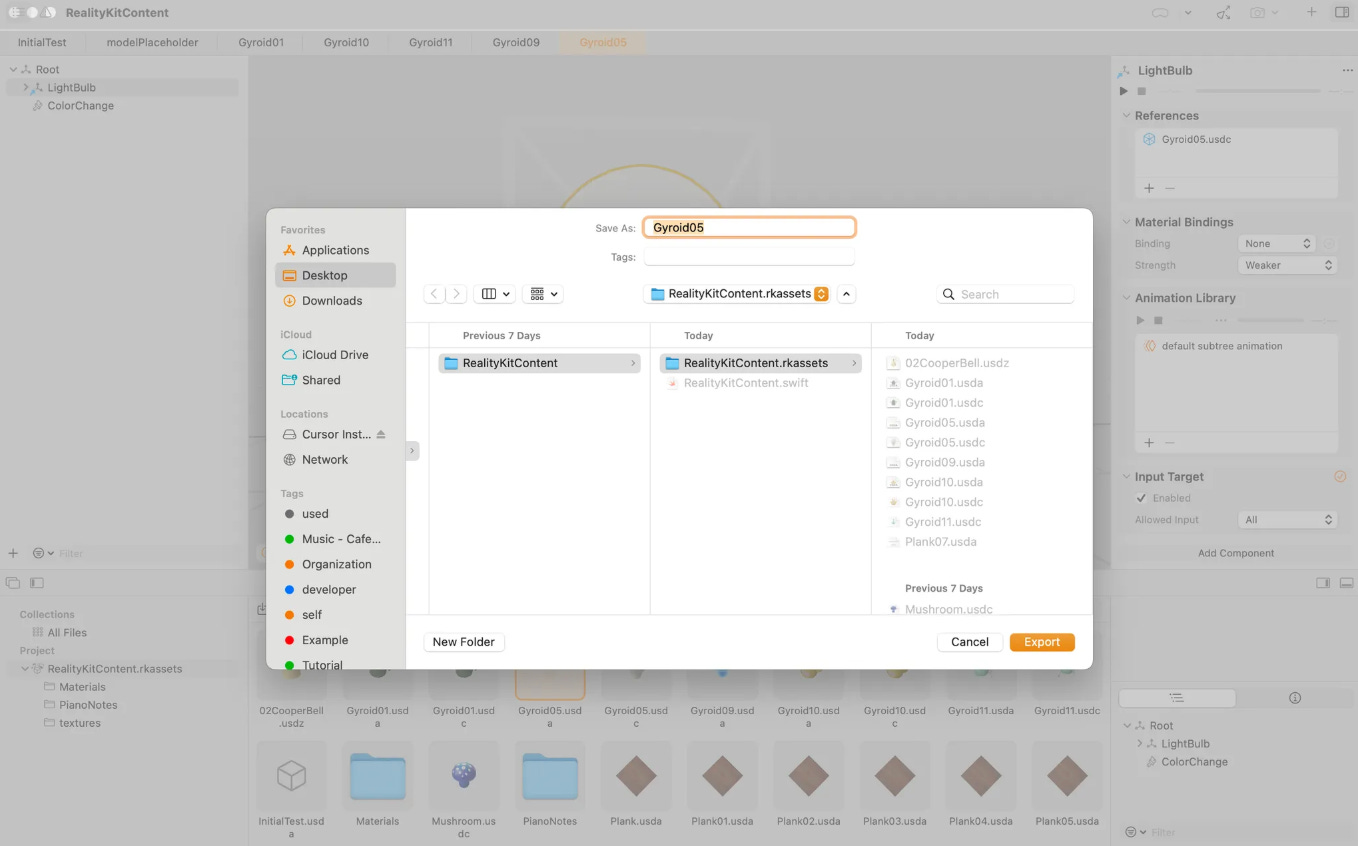
Step 3: Export .usdz from RCP

Now in your Project Browser, you’ll see:
.usdc
.usda
.usdz
You only need the .usdz. That’s the final model, complete with materials and components.
move or copy it to your shared asset folder for the project.
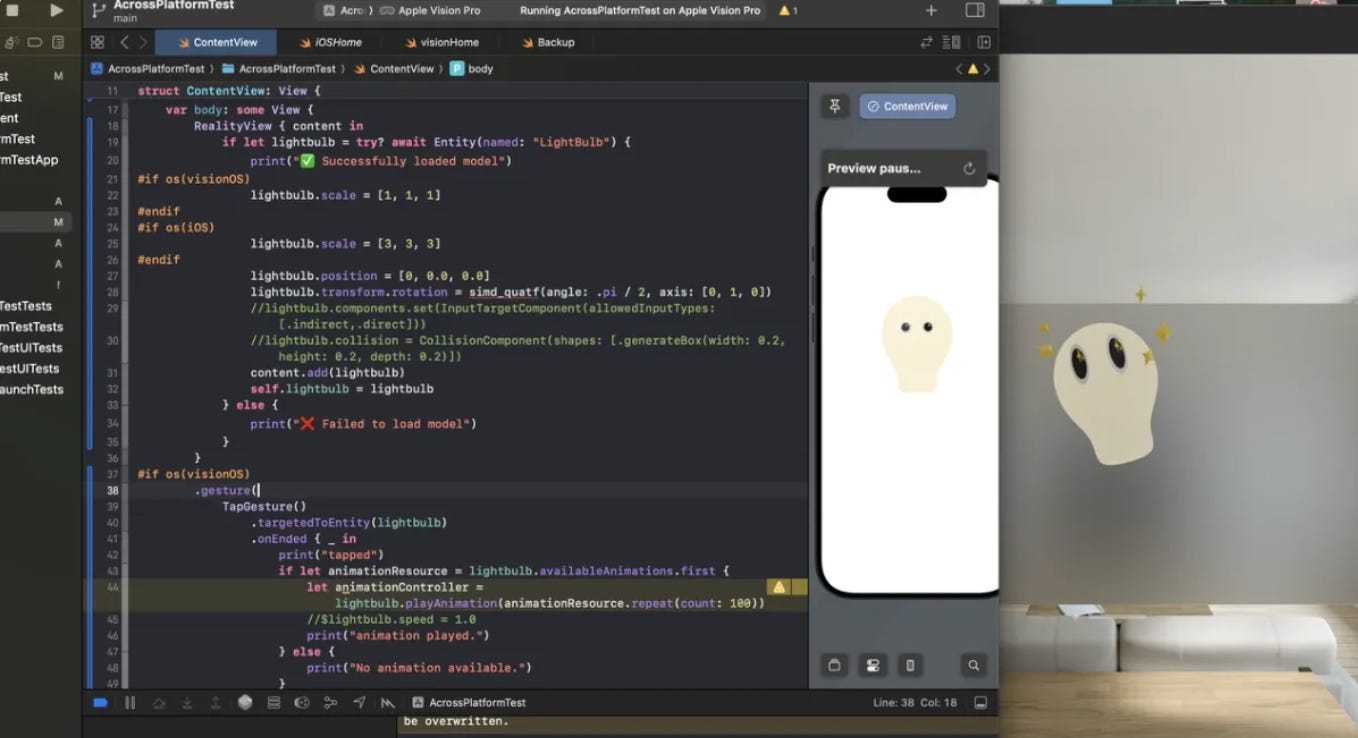
Call it in your codes, now it works on both iOS and visionOS.
import SwiftUI
import RealityKit

struct ContentView: View {

    @State private var lightbulb: Entity = Entity()

    var body: some View {
        RealityView { content inif let lightbulb = try? await Entity(named: "LightBulb") {
                print("✅ Successfully loaded model")
#if os(visionOS)
                lightbulb.scale = [1, 1, 1]
#endif
#if os(iOS)
                lightbulb.scale = [3, 3, 3]
#endif
                lightbulb.position = [0, -0.1, 0.0]
                lightbulb.transform.rotation = simd_quatf(angle: .pi / 2, axis: [0, 1, 0])
                // you don't need the following codes if set in RCP already
                //lightbulb.components.set(InputTargetComponent(allowedInputTypes: [.indirect,.direct]))
                //lightbulb.collision = CollisionComponent(shapes: [.generateBox(width: 0.2, height: 0.2, depth: 0.2)])
                content.add(lightbulb)
                self.lightbulb = lightbulb
            } else {
                print("❌ Failed to load model")
            }
        }
#if os(visionOS)
        .gesture(
            TapGesture()
                .targetedToEntity(lightbulb)
                .onEnded { _ in
                    print("tapped")
                    if let animationResource = lightbulb.availableAnimations.first {
                        let animationController = lightbulb.playAnimation(animationResource.repeat(count: 1))
                        //$lightbulb.speed = 1.0
                        print("animation played.")
                    } else {
                        print("No animation available.")
                    }
                }
        )
#endif
    }
}

#Preview {
    ContentView()
}
With this shared .usdz model, you can still set different scales, behaviors, or interactions per platform inside your Swift code. Same model, different vibes.
💡 Extra Tips: Clean Up Your Models
Before you load someone else’s .usdz model into your app, do a pre-clean. Hidden or leftover collisions from the original file can mess with your app’s performance or cause unexpected interaction bugs.
Optional best practice:
Split your assets into two types of models:
Scene models (e.g. static background or environment—no interaction needed)
Interactive models (user-tappable, movable, etc.)
Load them separately. For example:
Load the static scene first.
Load interaction models afterward.
And one more step, make sure to clean up all hidden/ unwanted collision of the static scene model.
Why? For scene models, you don’t need any triggers or collision logic. So to keep things clean, use a utility like removeInputTargets() to strip away any hidden collision components. These invisible leftovers can sometimes block taps, confuse gesture handling, and it’s not easy to spot. So the little tool below could help a little.
 // Remove all InputTarget components in the scene environment model
               func removeInputTargets(from entity: Entity) {
                   if entity.components[InputTargetComponent.self] != nil {
                       entity.components.remove(InputTargetComponent.self)
                   }

                   for child in entity.children {
                       removeInputTargets(from: child)
                   }
               }
               removeInputTargets(from: roomScene)
And the full example below:
RealityView { content in
               // load the scene environment first
               guard let roomScene = try? await Entity(named:"RoomScene", in: realityKitContentBundle) else {
                   print("Scene model not loading")
                   return
               }
               let scaleFactor: Float = 1
               roomScene.scale = [scaleFactor, scaleFactor, scaleFactor]
               roomScene.position = [0, 0.0, 0]
               roomScene.components.set(GroundingShadowComponent(castsShadow: true))
               content.add(roomScene)
               self.roomScene = roomScene

               // Remove all InputTarget components in the scene environment model, call the func here
               func removeInputTargets(from entity: Entity) {
                   if entity.components[InputTargetComponent.self] != nil {
                       entity.components.remove(InputTargetComponent.self)
                   }

                   for child in entity.children {
                       removeInputTargets(from: child)
                   }
               }
               removeInputTargets(from: roomScene)

                // Load interactive models
                guard let room = try? await Entity(named:"Objects", in: realityKitContentBundle) else {
                    print("Objects not loading")
                    return
                }
                let scaleFactorObjects: Float = 1
                objects.scale = [scaleFactorObjects, scaleFactorObjects, scaleFactorObjects]
                objects.position = [0,0,0]
                objects.components.set(GroundingShadowComponent(castsShadow: true))
                content.add(objects)
                self.objects = objects

                //IBL Lighting

… // other code snippets

}

… // other code snippets
We’ll continue this series next time
👋 See y’all till next time.


