
One Code, Two Platforms, 200% Efficiency (1/3)
How to Use the Same Code for visionOS & iOS

It's been a while since my last post—I've been busy developing my own apps. Now, I'm ready to share some firsthand insights into developing apps across visionOS and iOS (with a bit of help from AI). I hope you find these experiences useful!
Today's topic tackles exactly what I'm currently working on:
How to Use One Codebase for Two Platforms (visionOS & iOS)? Achieve 200% Efficiency!
Let's dive right in!
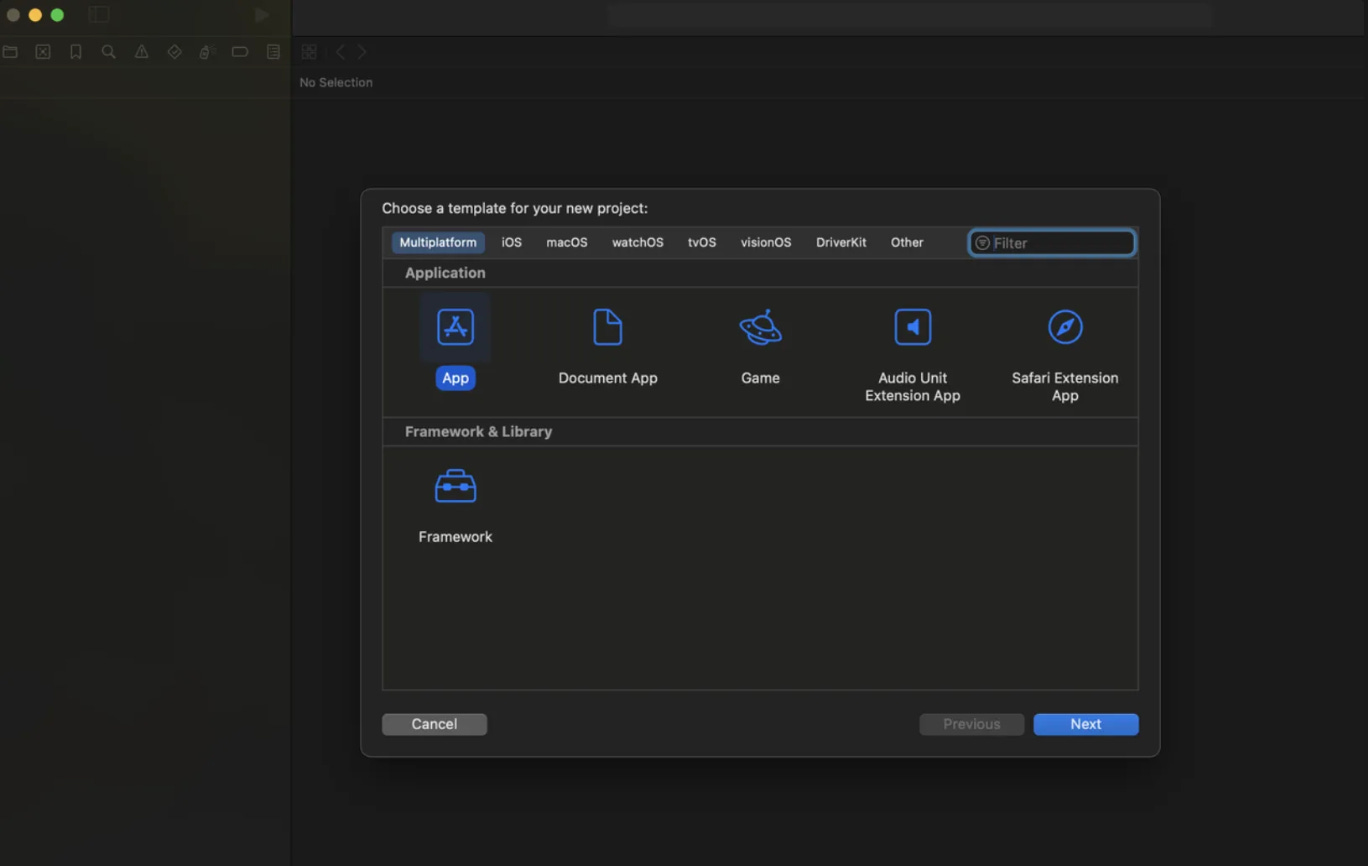
When you start a project meant to run on both iOS and visionOS, remember to select the Multiplatform template—not the individual iOS or visionOS templates!
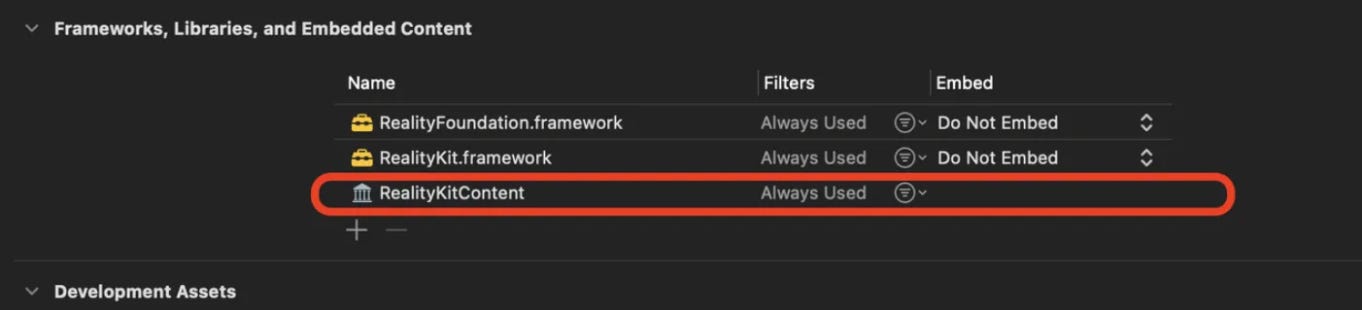
Remember to import RealityKitContent into framework manually if you plan to use models from this framework, add in the framework session.
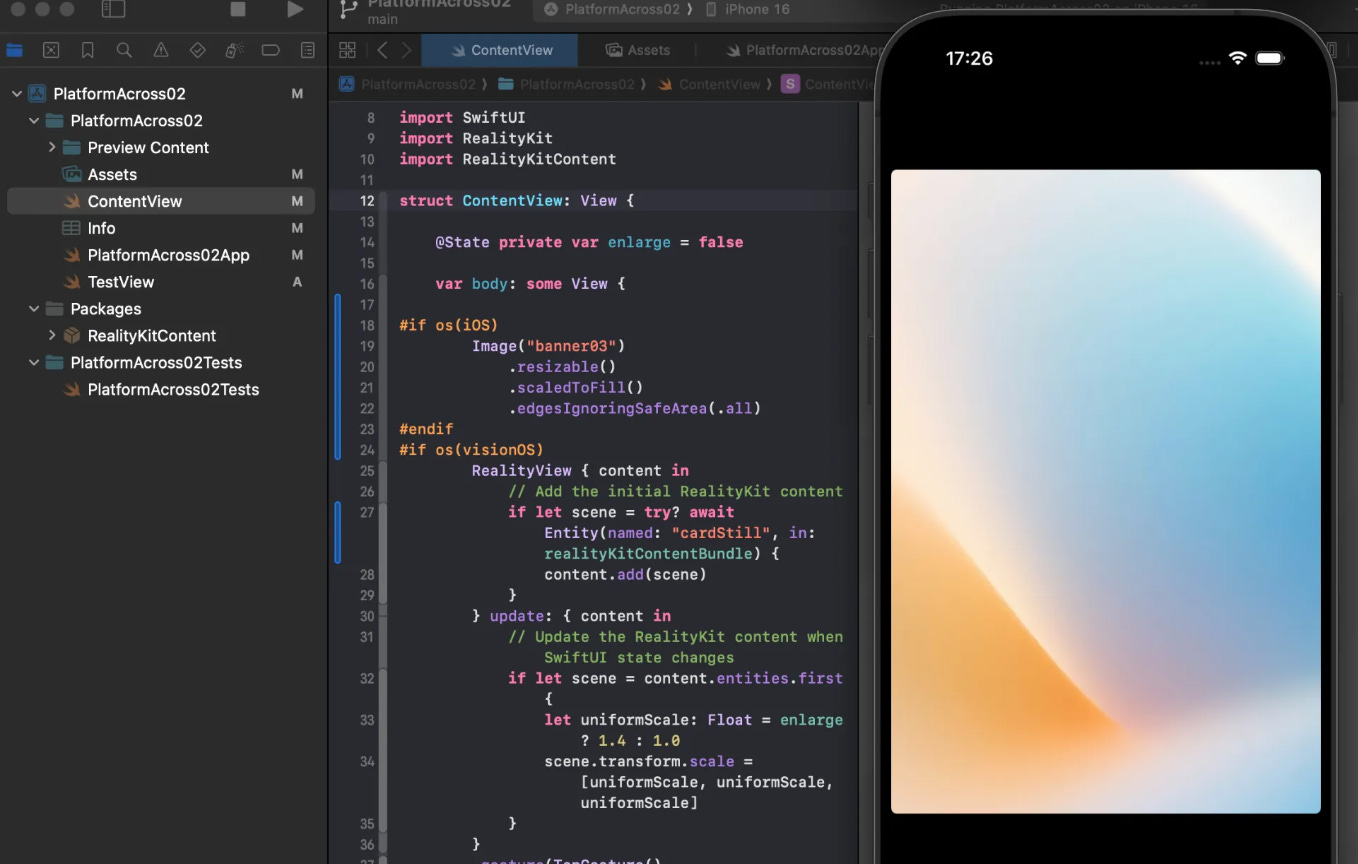
To write platform-specific code, use conditional compilation blocks like this:
#if os(iOS)
    // Your iOS-specific code here, or vice versa
#else
    // Your visionOS-specific code here, or vice versa
#endif
For shared code that runs identically on both platforms, simply leave out these system-specific conditions.
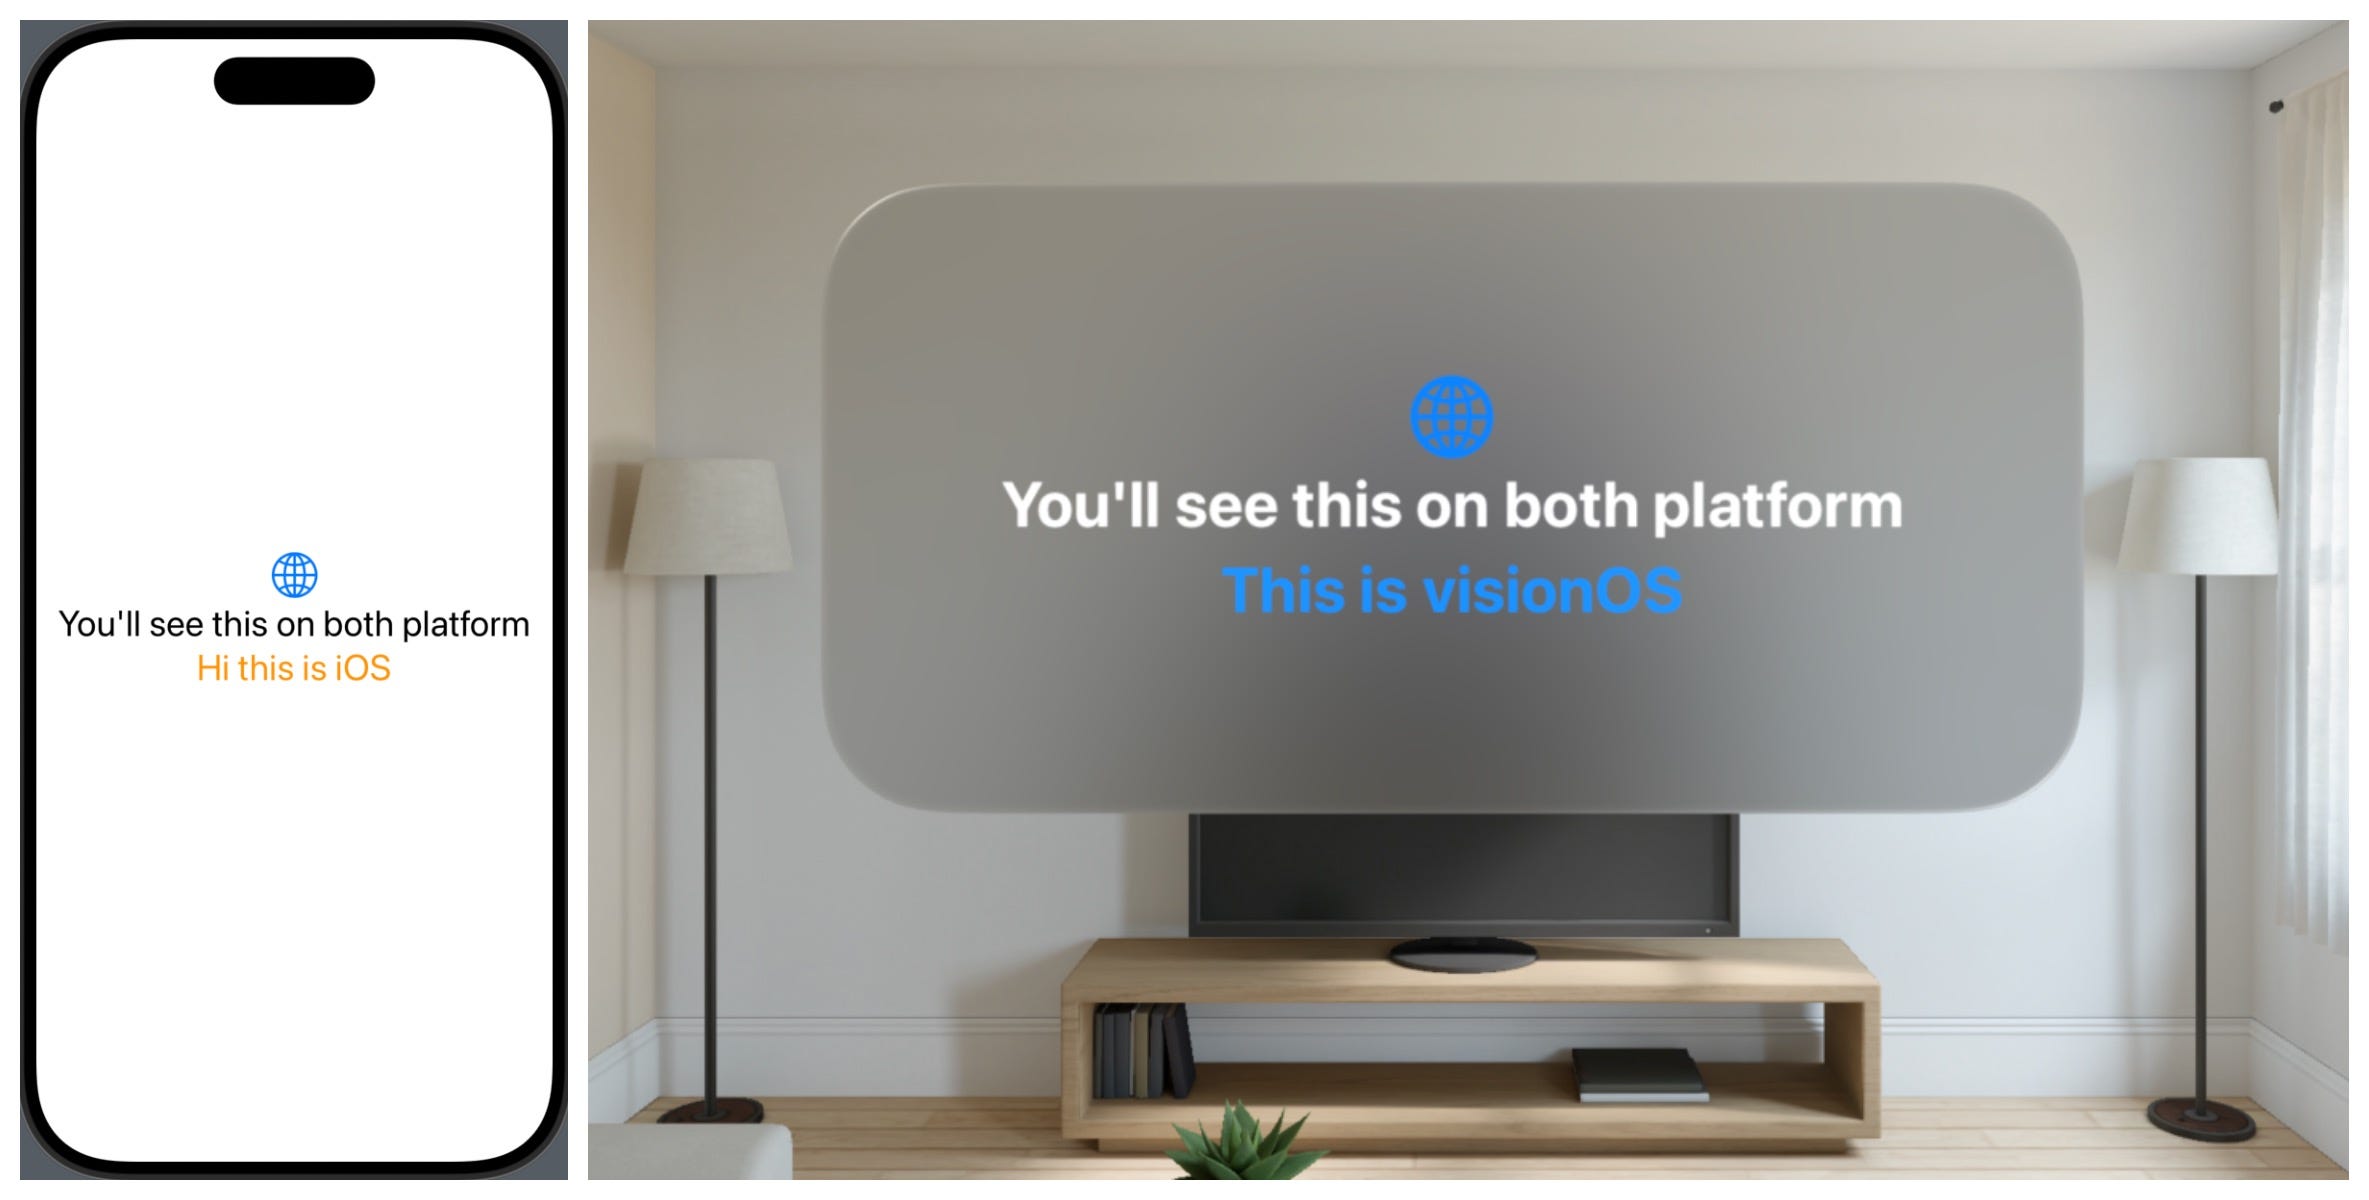
import SwiftUI
import RealityKit

struct ContentView: View {

    var body: some View {
        VStack{

            Image(systemName: "globe")
                .imageScale(.large)
                .foregroundStyle(.tint)

            Text("You'll see this on both platform")
#if os(iOS)
            //iOS Text
            Text("Hi this is iOS")
                .foregroundColor(.orange)
#endif

#if os(visionOS)
            //visionOS Text
            Text("This is visionOS")
                .foregroundColor(.blue)
#endif

        }
            .font(.title)

// visionOS Style
#if os(visionOS)
        .frame(width:480, height:240)
        .glassBackgroundEffect()
#endif

    }
}

#Preview {
    ContentView()
}
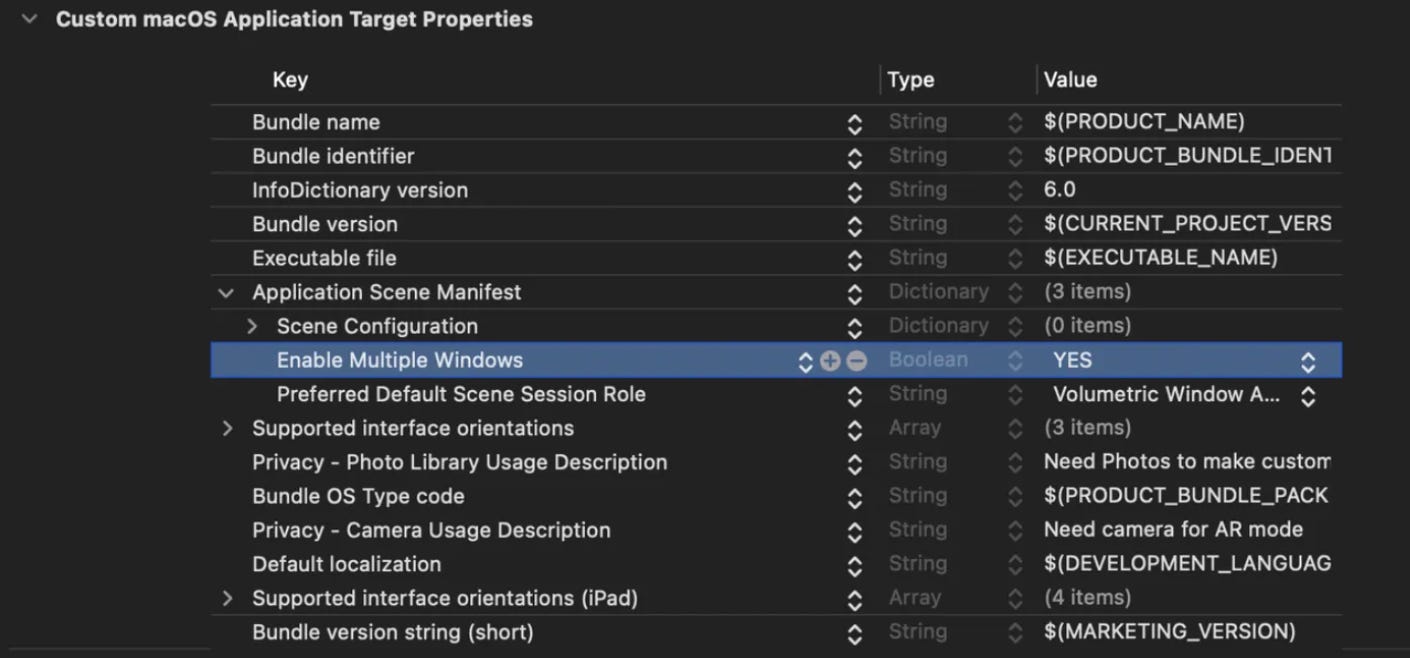
Setting the initial scene in a multiplatform visionOS app is slightly different. Unlike a visionOS-only app, you won’t easily find the necessary settings in info.plist (under Application Scene Manifest). Instead, follow these steps:
Navigate to Project → Custom → Info.
Click Add Row.
Insert your own Application Scene Manifest → Preferred Default Scene Session Role.
Select either a window or volumetric style based on your needs.
Additionally, enable multiple windows by setting Enable Multiple Windows to Yes. While visionOS-only apps usually enable this by default, multiplatform projects require you to set this manually.
Both iOS and visionOS utilize NavigationLinks for navigation. However, visionOS offers exclusive navigation methods such as openWindow/dismissWindow and openImmersiveSpace/dismissImmersiveSpace. Keep this in mind while designing your app navigation!
These tips cover the basic setup for cross-platform iOS and visionOS projects.
In my next article, I'll dive deeper into handling 3D settings and models across these two platforms.
Stay tuned!